
As mentioned in my last post, I bought a cute woodland panel for 50 cents at a recent Super Bowl Sale. I thought it would make a great donation quilt for "Quilts for Kids". The fabric was called "Forest Frolic" and consisted of six 9" square animal motifs, plus two banners with chickadees.

The quick and easy thing to do would have been to cut out five of the animal motifs and set them together in a big nine patch block. But... that would have left me with one extra animal motif, and two of these cute little chickadee rows:

So, I decided to cut into the panel and see what else I could come up with. (Hey, for 50 cents I didn't have much to lose.)
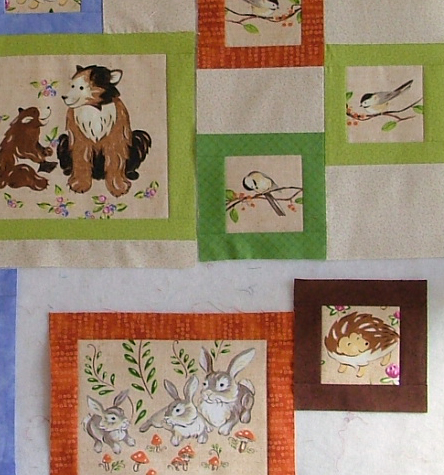
I trimmed around each of the motifs, including the chickadees and set them out on my design board:

Then I cut 1 1/2" strips from each of 5 coordinating fabrics:

and began sewing borders around each of the motifs:

I played around a bit, and eventually, ended up with this arrangement:

Now came the fun part. How to piece this puzzle? I measured each component and charted it out on graph paper.

The chart helped me to figure out what size the background pieces had to be, and how to organize the piecing into smaller subunits. (I actually enjoy these types of calculations, so don't feel bad for me.)
I considered using a variety of different fabrics for the background pieces, but, I would have had to subdivide them into even smaller pieces in order to avoid having two of the same colored fabrics touch, and that was taking this challenge just a little too far.
Instead, I chose a basic beige fabric for the background to mimic the block centers, and started building up my puzzle:
I was able to construct the quilt top into 3 big pieces, and only had to do some partial piecing on one of the sections. (I think my experience making my Long Time Gone quilt helped me out quite a bit.)

After sewing those last few seams, I added a narrow brown border to visually contain the squares, and some fun asymmetrical borders with bright orange cornerstones to finish off the top. Here is the big finish:

I'm happy with the outcome. I think it will make a cute quilt for either a boy or girl, and one thing is for sure...it is one-of-a-kind!
I still have plenty of the coordinating fabrics to put toward future quilts and now my brain can go work on something else.
I LOVE it. How inspring. I, too, have an odd panel that came to me that is too cute to throw away. Maybe this is just the idea I needed!
ReplyDeleteThanks! It was fun to just start with a basic panel and see where things went from there. I hope it works out well for your panel, too.
DeleteI love how you came up with your own way of doing this. Came out great!
ReplyDeleteThanks! Sometimes you just have to see where the fabrics take you.
DeleteLOVE IT!! Creative and cute!
ReplyDelete