Saturday, March 31, 2012

Valentine for Granny

I have finished the Granny squares quilt top:

My original plan was to put red borders on it, but when I saw them sewn on, I thought the large red outer border was too overpowering for the center squares.  Here is the "before" picture:

Faced with the prospect of unsewing the four borders, I decided instead to just trim them down instead and then add a white border.  The red trimmings won't go to waste.  They are just wide enough to use as binding.  I think a red binding will be just the finish this quilt needs.

I really enjoyed making this quilt, and am thinking of making another one using Civil War repros.

On the knitting side of things, I have finished the front of the sweater I am making for my son:

The shoulder shaping on the first side was less difficult than I thought it would be, but I had a hard time reversing the shaping for the other side.  The instructions tell you to work the same as the first side, just reversing the shaping.  I had to write out by hand the reverse shaping because I couldn't seem to keep it straight in my head.

Now it's on to the sleeves!

post signature

Sunday, March 25, 2012

A dozen Grannies


I have 12 Granny squares finished now.


I want this to be a wall hanging, so I'm going to stop with a dozen blocks.  I made my squares 2" to begin with, and so my finished block size is about 6".

I have finally decided upon a name for this quilt.  I'm going to call it "Valentines for Granny".

I made the first few blocks one at a time, but by the time I made the second set of six blocks, I was doing as much chain piecing as possible.  I want to show you a handy gadget I have for cutting apart a long chain of pieced units.

It's called "The Cutting Gizmo" and is basically a razor blade on a stand.  You take a stack of chained pieces like this:

and press the connecting threads onto the blade to cut them:

In no time at all you have a stack of separated block units:

I find this so much easier than using scissors to cut them apart.

And speaking of cuts... don't you just hate it when this happens?

See that little slice in the edge of the white fabric triangle? That's what happens sometimes when you are using leftover fabric from another project.   Of course I didn't see it until the block was sewn together.

Have a great week!

post signature

Thursday, March 22, 2012

Rockin' with Granny

Here are the first six blocks of my red and white Granny square quilt.

See my previous post to read more about Granny squares.
post signature

Wednesday, March 21, 2012

Go Granny!

Perhaps you have seen the multitude of Granny square quilt blocks that are popping up all over the place.   It seems to have started with a blog post by Jolene Klassen at Blue Elephant Stitches.  It's a very simple, yet appealing block that is reminiscent of the crocheted granny square afghans that were so popular at one time.

Krista at My Bugs  suggested a Granny Square quilt along and the Granny craze was launched.  I have been seeing lots of marvelous granny squares posted in the flickr group that Krista created for the quilt along, and I finally decided to make one too.


I wanted to dig into a stash of red and white fabrics that I had collected, so I began cutting lots of 2" squares:


After a little sorting and swapping, I came up with my first 2 Granny square blocks:

As I work on these, I've been mulling over what name to give the quilt.  There was one quilter in the flickr group that used all fruit and vegetable fabrics for her granny squares and she called it "Granny goes to Market".  I've been thinking maybe "Granny paints the town Red", but I've also considered "Making Granny Blush", "Granny sees Red", and even "Redneck Granny".  I'm open to suggestions if you have one.

Speaking of red, I wanted to share with you my red loaf pan that I just love.

It is longer and narrower than the average 9 X 5 loaf pan, and as a result whatever I have baked in it comes out evenly cooked.


Take a look at this banana bread I made this past Sunday:

See what I mean?  Evenly cooked from one end to the other! 

The pan came from Ikea and was not expensive.  I have never actually been to an Ikea store, but my daughter sent me this picture of a quilt studio that she saw when she was there:


I guess I really need to go to Ikea sometime and see for myself. 

post signature

Thursday, March 15, 2012

Knit wit

I confess to doing more knitting than quilting lately, mostly because it's so easy to take a knitting project with me when visiting with my dad.  He came home from rehab about 2 weeks ago and I have been spending as much time as possible with him and with my mom to help with the transition and his continued recovery. 

I have finished the back of my son's sweater, and begun working on the front.  The pattern calls for 2 cables up the front.  I was a little confused with the pattern at first because it is not a traditional, single twist cable.  Instead, it looks more like a braid:

The braid was not hard to do, it just meant paying a little more attention.  I had never really noticed until now how many different kinds of knitted cables there are.

When it came time to start shaping the armholes, I laid it out to measure it against the back:

That's when I saw it. 

Oops!  Three stitches that should have been knit instead of purled.  I managed to fix them without pulling out a dozen rows of work, but it was a nail biter.

While all this was taking place, a certain party took advantage of my distraction and did this:

I don't think he looks particularly sorry....

but I forgave him anyway.

post signature

Saturday, March 10, 2012

They grow up so fast...


I finished knitting the back of my son's sweater, and laid it out on top of a sweater that he already has.  It looks like they are about the same size, so that's a relief.  I have yet to sort out how to shape the very top for the neck opening, but I'll cross that bridge when I come to it.

With a surprising lack of searching, I dug out the sweater I had knitted for him when I was pregnant. 

It is a little one-piece outfit that  his 3-year-old sister nicknamed "the Bubble Suit", due to the oversized bottom half.  (Diapers were a lot bigger back then!)  The pattern was pretty simple, just plain knit stitches with alternating stripes of yellow and white:

I couldn't help but compare today's sweater with yesterday's "bubble suit"
I guess my son really has grown a bit since I last knit him a sweater. 

In my defense, underneath the sweater in the photo is a well-loved Harry Potter quilt that I made for Sonnyboy when he was younger, so it's not that he's been forgotten in the handmade department.

post signature

Monday, March 5, 2012

Knitting needle Bling

I have a love/hate relationship with circular knitting needles.

I love that they are more compact than straight needles and therefore allow me to knit even when sitting in my recliner chair.  (The long, straight needles kept hitting the chair arms.) I tried short straight needles but they were not long enough to hold all the stitches I needed for a men's sweater.

What I hate about them is that the nylon cable that connects the needles is very stubborn and likes to stay curled.  I had hoped that after knitting with them a bit that they would relax a little, but they did not and I found myself struggling.  The perfect solution seemed to be a flexible knitting needle that would not extend to hit the arms of my chair, but that would not have the tension of being attached to the other needle.

I found a solution that worked for me
Prepare yourself. Some surgery was involved...
 
I snipped the nylon cable:
(Don't worry.  Those are NOT my fabric scissors!)

I needed to put a stopper on the end of the cable to keep the stitches from falling off.  My first thought was buttons, but then my thoughts turned to beads.  I am lucky enough to have a daughter who makes jewelry.  She was happy to let me dig into her bead stash:

The small seed beads would not fit on the cable, but I was able to find a few larger beads that would work.  I settled on these:

I slipped them onto each cable, then tapped the cut end of the cable a few times with a low-temp soldering iron to make a flat end that would keep the beads from sliding off:

a bit blurry, but I think you get the idea.

That's all it took, and now I'm a happy camper.  It's also kind of fun to have some needle bling.

This pattern called for 2 different sizes of needles, so I did the same to the second set:

One thing that I would change next time is to put the biggest bead closest to the working end of the needle.  Occasionally I have had one stitch go over the smaller bead and get momentarily stuck, but it's not a big deal.  My project may be gray, but my knitting needles are shiny and bright.


post signature

Saturday, March 3, 2012

Riddle me this

Question:  What's black and red and white all over?

Answer:  A black dog in a red sweater playing in the snow.


post signature

Friday, March 2, 2012

The Chronicles of YARNia

Armed with many skeins of this charcoal heather yarn and a pair of circular knitting needles, I began knitting the sweater for my son. 

I made myself a test gauge to be sure my stitches matched up in size to the pattern before starting, and then worked on the ribbing for the bottom.  At that point, I only had to use knit, purl and cast on stitches,  and those were all familiar to me.

To start the body of the sweater, the pattern said to increase 6 stitches.  Feeling confident that I could manage that, I knit the first row, increasing 6 times evenly as I went.   On the return row of purl knitting, I realized that I did not remember how to increase because I had created 6 holes in the sweater instead.  Rookie mistake.

Ripped out those rows,  looked up "how to increase" in a knitting book and tried a second time.  This time I got it right, and began the body of the sweater.  Again.

About 8 rows in, I came across a random hole.  I think I had mistakenly done a "yarn over".  Ripped out about 4 rows and started up again.  After a few nights work, I had about 8 inches of the back done.


I laid it out on top of a sweater that my son already owned and that fit him well.  It was easy to see that my knitted sweater was going to be too small.  Another rookie mistake.  I should have compared my work to the storebought sweater about 4 inches sooner and saved myself a lot of time.   I had to start over.  Again.

I went back an looked through the pattern book I had bought, ignoring the crazy eyes and the sullen stares of the models and found a nice crewneck sweater that looked more roomy, then convinced my son that v-necks were overrated anyway. 
Then came the hard part, ripping out everything I had done so far:

Going....
Going...
Gone.....

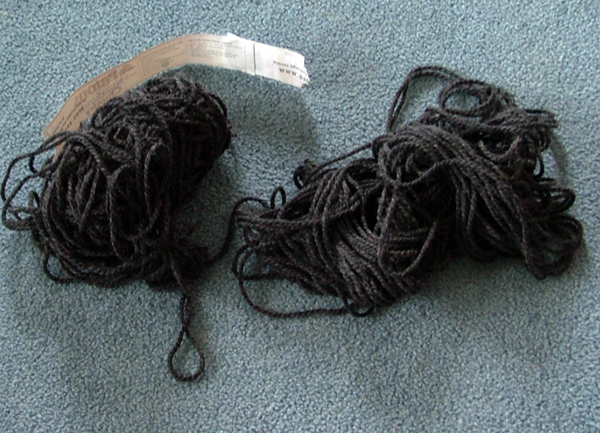
Before I could start over, I had to deal with this...

a mountain of yarn sitting there on the table. 

 I lamented to my knitting expert sister about losing the convenience of a pull-skein, where your skein stays in one place while you pull yarn from the center.  She showed me how you can wrap a ball of yarn and make your own pull skein, a technique I will graciously share with you:

Start wrapping the yarn around your fingers, making sure to leave a long tail hanging out from the center:

Continue winding your yarn into a ball, always making sure the tail end is hanging free:

When you are finished, you will have a nice, tidy ball of yarn with a pullstring from the center:

Now I was ready to start the sweater project all over again, but not without a nice, consoling cup of tea and a good night's sleep first.

Stay tuned....

post signature