
In the past, I would have cut 36 yellow squares, drawn a diagonal line across the center of each one and then sewn them to 18 rectangles using a sew and flip method.
I have never been fond of drawing those lines, and thanks to a new ruler, I no longer have to. If you read my last post, you have already seen one use for the "Quick Trim and Circle" ruler. Here is another great use for it.
I started with a 36 yellow squares:

I took the first stack of 4 and positioned the ruler over them so that the white lines on the ruler lined up with the top and right edges of the square:

(Notice that the dotted line on the ruler makes a perfect diagonal from corner to corner)
Cut off that little corner triangle:

After cutting, you have this triangular unit:

(In a different world, in a far off galaxy, I would save those perfectly cut right triangle pieces that I just cut off, and make a little pinwheel quilt, but this is not that world.)
I made the same cut to 7 more stacks of 4 squares:

In no time at all, I had a nice stack of 36 triangular units for my Flying Geese:

So much faster than drawing all those lines!
Here is how to use these units to make a Flying Geese block. Start with the yellow triangular unit and a rectangle:

Place the triangle unit, right sides together, on top of the rectangle, using the short straight edges to line them up:

Look closely. The bottom left corners match up like this:

and the other side matches up like this:

Once you have the two pieces positioned, sew a quarter inch seam along the diagonal side of the triangle unit piece:

Flip open and press:

At the ironing board, you can use the fact that the rectangle is still attached in the background to perfectly (or as close as you can get) line up the triangle unit.

The back of the unit looks like this.

Trim the blue triangle area to a quarter inch seam allowance:
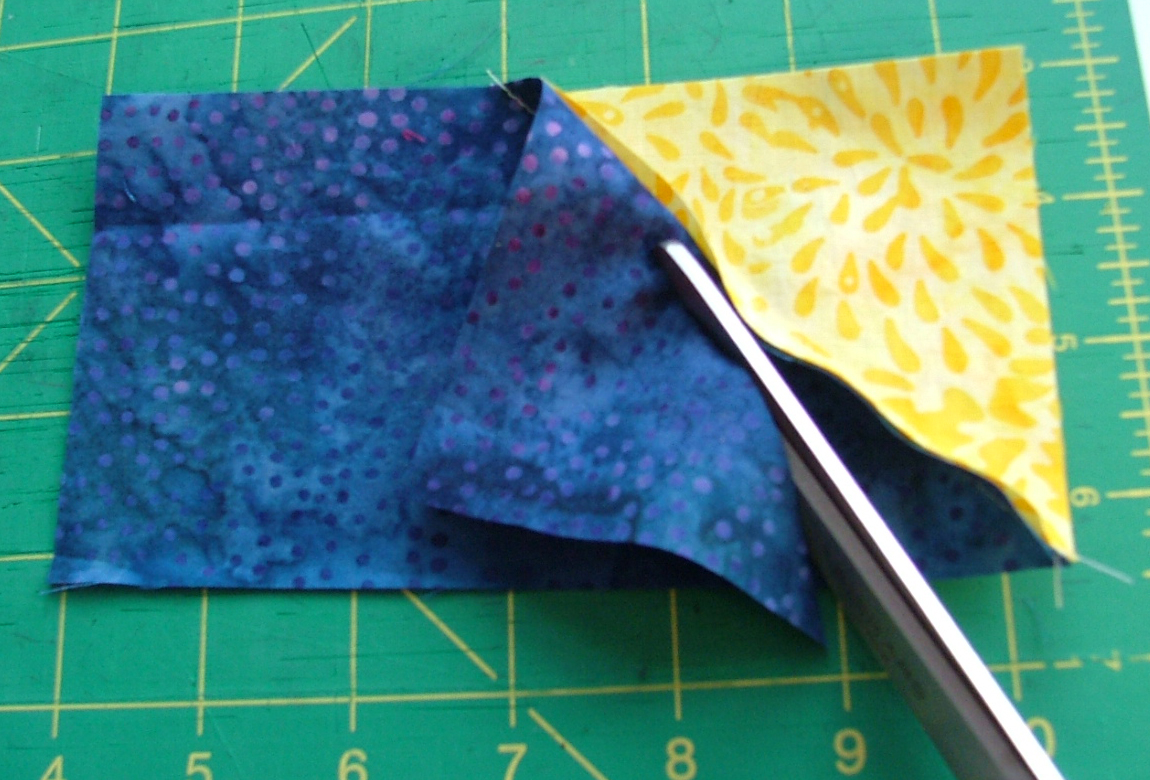
(I recommend you do this from the front side, holding the yellow triangle away from the blue rectangle, but it was easier to show from the back.)
Now to add the other side. This time position the triangular unit like this:

The bottom right corners match up like this:

and the opposite corner lines up like this:

Sew a quarter inch seam along the diagonal side of the triangle unit:

Then flip open, press and trim like before. Your Flying Geese unit is now complete, and you never had to pick up a marking pencil!

Looks like a great ruler to add to my collection. Love the potato chip bags.
ReplyDeletegreat tutorial. I love flying geese, I may make some now I see how easy it is!
ReplyDeleteYour flying geese look perfect! That ruler seems a great tool to have around!
ReplyDeleteThanks for the great instructions for using a great ruler!
ReplyDeleteGreat tutorial! blessings, marlene
ReplyDelete